How to Remove Background from Video for Free?
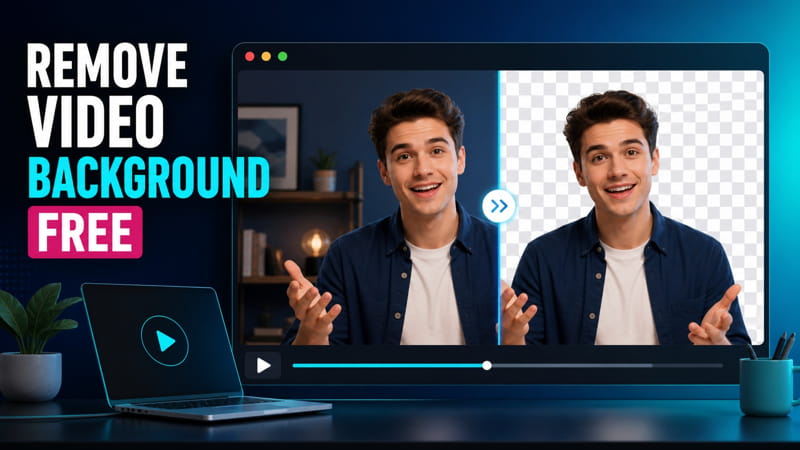
Removing a video background no longer requires expensive software or a powerful computer. With the right browser-based workflow, you can isolate a person, logo, product, text, or animated graphic, replace the background, and prepare the result for a video editor without uploading the original video to a server.
In this guide, you will learn how to remove a background from a video for free with the Valsolution Free Online Video Background Remover. We will cover every removal mode and setting, explain how the browser processes the video, and show you how to remove the final solid color with Chroma Key in VSDC, DaVinci Resolve, Adobe Premiere Pro, CapCut, or another editor.
Quick answer: Open the free tool, upload a video of up to 30 seconds and 50 MB, select the most suitable background-removal mode, adjust the color tolerance and edge softness, choose an export color that is not present in the subject, and download the WebM file. In your video editor, place the WebM above a new background and remove its solid export color with Chroma Key.
What is the Valsolution Video Background Remover?
The Valsolution Video Background Remover is a free browser tool for separating a foreground subject from a video background. It is designed for short videos and works locally on your device. Your selected video is not uploaded to the Valsolution server.
Unlike a basic green-screen remover, the tool offers three different removal methods. This matters because a person, a logo animation, and bordered text do not need the same type of processing.
- Outside Background: removes a matching background color only when that color is connected to the edges of the frame.
- Remove Color Everywhere: removes the selected color from every matching area in the frame.
- Person AI: uses person segmentation to keep a prominent person and remove the surrounding scene.
The tool also provides manual color selection, automatic corner detection, color tolerance, edge softness, multiple performance modes, a live checkerboard preview, and a custom chroma-key export color.
Video limits and browser requirements
Browser video processing can use a large amount of memory, especially on phones and low-end computers. To keep the tool practical and reduce browser crashes, the current limits are:
- Maximum video duration: 30 seconds
- Maximum file size: 50 MB
- Maximum processing resolution: up to 480p
- Recommended browsers: recent versions of Google Chrome or Microsoft Edge
Shorter clips process faster. If you have a long video, trim it into smaller sections before using the tool, then combine the processed clips in your editor.
How to remove a background from video free
Step 1: Open the free video background remover
Visit the free online video background remover. No account or software installation is required. The tool will run inside your browser.
Step 2: Upload a short video
Choose a video that is no longer than 30 seconds and no larger than 50 MB. After the file loads, the page displays the original video beside the background-removed preview.
The preview uses a checkerboard pattern to represent the pixels selected for removal. This checkerboard helps you inspect the result, but the final browser-recorded file uses a solid chroma-key color for reliable compatibility.
Step 3: Choose the correct removal mode
Selecting the correct mode is the most important part of the process.
Outside Background
Use Outside Background for logos, product graphics, titles, animated icons, and videos with bordered text. The tool begins at the frame edges and removes only connected areas that match the selected background color.
This method can preserve an enclosed area of the same color inside the foreground. For example, if a logo contains black details and the outer background is also black, Outside Background may remove the outer black area while protecting matching black pixels enclosed by the logo.
Remove Color Everywhere
Use Remove Color Everywhere when one solid color should disappear from the entire image. It works well for a conventional green screen, blue screen, or a clean graphic with a uniform background.
Be careful: if the selected color also appears in clothing, text, a logo, or the main subject, those matching areas may also be removed. Choose Outside Background instead when the same color must remain inside the design.
Person AI
Use Person AI when the video contains a clearly visible person and the existing background is complex or contains many colors. The browser downloads the person-segmentation model when this mode starts, but the source video itself stays on your device.
Person AI is intended to recognize human shapes. It may not preserve separate logos, captions, product graphics, particles, or decorative elements that are not connected to the person. For animated graphics and text-heavy videos, one of the color-based modes is usually more suitable.
Step 4: Select the source background color
For a color-based mode, tell the tool which color belongs to the original background. You can:
- let the tool detect the color from the video corners;
- choose a color manually with the color control; or
- use the browser or screen color picker when available.
Automatic corner detection is a useful starting point when the corners contain only the background. Select the color manually if a corner contains part of the subject or if the detected color is inaccurate.
Step 5: Adjust color tolerance
Color tolerance controls how similar a pixel must be to the selected source color before it is removed.
- Use a lower tolerance to protect text, logos, glow, fine outlines, and colors close to the background.
- Increase tolerance gradually when shadows, compression noise, or uneven lighting leave patches of the old background.
- Do not begin with a very high value. Excessive tolerance can erase parts of the foreground.
Watch several points in the video instead of judging only one frame. A setting that looks clean at the beginning may remove an object later when lighting or motion changes.
Step 6: Refine edge softness
Edge softness blends the boundary between the retained foreground and the removed background. A small amount can reduce harsh, pixelated edges. Too much softness can make text and logos appear blurred or produce a visible halo.
For people and hair, try a slightly softer edge. For bordered text, icons, and sharp graphics, keep the value low.
Step 7: Select a performance mode
The performance setting balances speed and detail:
- Low-end mode: processes at approximately 360p and 12 FPS. Choose it for older computers, lower-memory phones, or faster testing.
- Better quality mode: processes at approximately 480p and 15 FPS. Choose it when the device can handle more work and cleaner detail is important.
Start with the lower mode if the preview stutters or the browser becomes unresponsive. A successful 360p export is more useful than a higher setting that cannot finish on the device.
Step 8: Choose the output chroma-key color
After removing the original background, choose the solid color that will appear behind the isolated foreground in the downloaded video. You may select any color, but it must be absent from the foreground.
Bright magenta, green, or blue often works well because these colors are easy to identify in an editor. However, there is no universal best color. Do not select green when the subject wears green, magenta when a logo contains magenta, or blue when blue objects must remain.
Remember or copy the exact HEX value. You will select the same color in your video editor.
Step 9: Process and download the WebM
Review the preview and select Remove Background & Export. Keep the page open while the browser processes the frames. When processing is complete, download the WebM file.
Processing time depends on video length, frame size, selected mode, browser, and device performance. Person AI generally requires more processing than a simple solid-color background.
Why does the downloaded video contain a solid color?
The on-page checkerboard shows where the background has been selected for removal. However, browser Canvas and MediaRecorder implementations do not reliably preserve an alpha channel in the final recorded video. A file that appears transparent in the preview may be flattened to black by the browser or shown as black by a media player.
For a predictable workflow, the tool exports a solid color chosen by the user. That color is then removed in a video editor with Chroma Key. This is why choosing a color that does not appear in the foreground is essential.
How to remove the final color in a video editor
The general workflow is the same in most editors:
- Import the downloaded WebM and the replacement background.
- Place the replacement image or video on a lower timeline track.
- Place the downloaded foreground clip on the track above it.
- Apply the editor's Chroma Key, Color Key, Ultra Key, or Background Remover effect.
- Use the eyedropper to sample the exact solid export color.
- Increase tolerance or similarity slowly until the color disappears.
- Refine edge, feather, spill, or matte controls without damaging the subject.
- Preview the complete timeline and export the final video.
Remove the color in VSDC Free Video Editor
Select the foreground clip, then open Video effects > Transparency > Background remover. In the Properties window, use the picker beside Chromakey color and click the solid color in the preview. Adjust Similarity, Blend, and Adaptive alpha if a colored outline remains.
Remove the color in DaVinci Resolve
Place the replacement background below the foreground clip. On the Edit page, open Effects > Open FX and apply 3D Keyer. Sample the solid color, then refine the matte and despill controls to clean the edge.
Remove the color in Adobe Premiere Pro
Apply Video Effects > Keying > Ultra Key to the foreground clip. In Effect Controls, choose the eyedropper beside Key Color and sample the solid background. Use Matte Generation, Matte Cleanup, and Spill Suppression to improve the result.
Remove the color in CapCut Desktop
Select the foreground clip and open Video > Remove BG > Chroma key. Use the color picker to select the solid background, then refine Intensity, Shadow, Feature edge, and Clean up edge.
Tips for a cleaner video background removal
- Use a short, well-lit video with a clear difference between the foreground and background.
- Avoid an output color that appears anywhere in the subject.
- Use Outside Background for logos, bordered text, and enclosed matching colors.
- Use Remove Color Everywhere only when every matching pixel should disappear.
- Use Person AI for a prominent person, not for preserving unrelated graphics.
- Start with low tolerance and increase it gradually.
- Check the beginning, middle, and end of the video before exporting.
- Keep edge softness low for text and sharp artwork.
- Try low-end mode if the browser slows down or processing fails.
- Complete the final Chroma Key inside an editor instead of judging transparency in a media player.
Common problems and solutions
Parts of the text or logo are disappearing
Reduce color tolerance. If the matching color is enclosed inside the logo or text, switch from Remove Color Everywhere to Outside Background. Person AI should not be used when the graphic itself must be preserved.
The old background is still visible around the subject
Confirm that the correct source color is selected, then raise tolerance a little at a time. A slight increase in edge softness may help, but too much can blur the subject.
The downloaded file looks black in VLC or another player
A normal media player does not perform Chroma Key compositing. Import the WebM into a video editor, place a new background below it, and remove the selected export color with the editor's keying effect.
The browser becomes slow or processing fails
Use a shorter clip, close unnecessary browser tabs, select the low-end 360p/12 FPS mode, and try a recent version of Chrome or Edge. Very complex Person AI processing needs more memory than color-based removal.
Is the online video background remover private?
The selected video is processed locally in your browser and is not uploaded to the Valsolution server. Person AI mode must download its segmentation model before it can run, but that does not mean the source video is uploaded.
Local processing improves privacy, but performance depends on your own device. Keep sensitive source files on a trusted device and close the browser tab when you have finished.
Optional: add a 5.1-channel audio mix to your video
After replacing the video background, you may also want to give the final project a wider multichannel sound. Upmixify — 5.1 Audio Converter is an Android mixer app that can convert a mono or stereo source into a mixed 5.1 or 7.1-channel audio file.
- Prepare or export the mono/stereo audio used in your video.
- Open it in Upmixify and create the required 5.1 or 7.1-channel mix.
- Import the new audio file into your video editor.
- Align it with the video, mute or replace the old audio track, and export using a format that supports your chosen channel layout.
Upmixify is a mixer. It creates additional output channels from the source audio; it does not recover original studio-recorded surround information that was removed during a mono or stereo mixdown. Also check that your video editor, export codec, player, and playback device support multichannel audio.
Frequently Asked Questions
Can I remove a video background online for free?
Yes. The Valsolution Video Background Remover processes videos of up to 30 seconds and 50 MB in the browser without requiring an account or uploading the source file to the Valsolution server.
Can I select any background color for the exported video?
Yes. Choose any export color that is absent from the subject, text, logo, clothing, and other foreground details. Select that same color with Chroma Key in your video editor.
Which removal mode should I use for a logo or bordered text?
Outside Background is usually the best choice because it removes edge-connected background color while protecting enclosed matching colors. Keep tolerance and edge softness low enough to preserve sharp details.
Does the downloaded WebM have a transparent background?
The browser preview shows the selected background as transparent, but browser recording does not reliably retain video alpha. The tool therefore exports a solid chroma-key color that you remove in a video editor.
Which browser works best for video background removal?
A recent version of Google Chrome or Microsoft Edge is recommended because the tool depends on modern Canvas, MediaRecorder, JavaScript, and WebAssembly capabilities.
Can the tool keep the original audio?
The tool attempts to preserve the source audio when the browser and input format support audio-track capture. Some browser or format combinations may produce an export without audio, so always test the downloaded file before deleting the original.
Final thoughts
A reliable free workflow does not end when the browser preview shows a checkerboard. The complete process is to isolate the foreground, export it over a safe solid color, and remove that exact color in a video editor. Choosing the correct removal mode and using conservative tolerance settings will protect the details that matter.
Start with the Valsolution Free Online Video Background Remover, test a short clip, and refine the settings before processing the complete segment.
Comments
Share a useful thought or ask a question about this article.
Leave a comment